
Introducción
-
En esta guía nos centraremos en jugar Urgot Reroll
-
El objetivo es rollear a nivel 6
-
Urgot 3* y con una buena anomalía nos puede asegurar el top 4
-
Hay condiciones específicas con la que podremos buscar un top 1
Composición de super Urgot


El mejor aumento: Desata a la bestia
¿ Por qué desata a la bestia ?
-
Este aumento nos da un Calibrador de Sterak mejorado
-
Cuando el efecto se activa, el portador obtiene un 35% de velocidad de ataque durante el resto del combate e inmunidad al control de adversario durante 10 s
-
La velocidad de ataque y la inmuunidad al control de masas es clave para garantizar daño y supervivencia
-
Con este aumento, idealmente buscaremos 3 Calibradores de Sterak
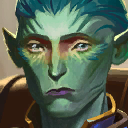
Los mejores ítems de Urgot
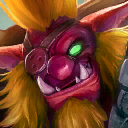
Los mejores ítems de Tristana
Las mejores anomalías de Urgot
-
Gigantismo: Gana 1000 de vida.
-
Baluarte : Obtiene 40 de armadura y 40 de resistencia mágica. Con más del 50% de vida, se triplica
-
Enraizado: Obtiene 700 de vida, 25 de armadura y 25 de resistencia mágica. No se puede mover ni quedar aturdido, y atrae a su objetivo hasta tenerlo al alcance
-
Fuerza imparable : Al conseguir un asesinato, carga contra el siguiente objetivo y lo aturde durante 1.5 s. Luego, se cura un 10% de la vida máxima
Juego temprano
-
Es importante tener componentes como Espada, Capa o vida para priorizar esta build
-
Lo importante es buscar ítems para el Urgot
-
Buscaremos maximizar economía con la racha de derrotas
-
Rara vez podremos hacer racha de victorias
Ejemplo de mesa fuerte en juego temprano

Juego medio
-
En este punto de la partida buscaremos estabilizar
-
URGOT 3* es lo prioritario en esta build
-
Si encontramos por el camino Tristana o Nunu podremos aspirar a un top mayor
Ejemplo de mesa estable en juego medio
Juego tardío
-
En este punto de la partida subiremos de nivel para añadir Artilleros
-
Los 4 artilleros son esenciales para maximizar el daño
-
Añadiremos costes 6 como Viktor o Mel al subir a nivel 9
Composición de super Urgot a nivel 9

Si os ha gustado este post no olvidéis seguir mi perfil:
- https://www.tacter.com/es/@snoodyboo
- Darle like a este post y comentadme vuestra opinión.
Subimos contenido semanal y actualizado del meta y de las todas las interacciones que necesitáis saber para mejorar en este juego.